
In this third of four posts about how to stay on track with your writing, I’ll be discussing Tip #3: Using Multiple Notebooks in Microsoft’s OneNote.
I use OneNote to keep at my fingertips all those things I used to find myself flipping through pages of manuscript to find because I knew they were in there but just couldn’t find them. The best thing about OneNote is that it not only works like a regular notebook, with separate sections and pages, it also permits me to color code everything and insert photos and hyperlinks right from the Internet. I can organize as loosely or as precisely as I want to.
For example, in my Writing Tips notebook I use 5 major sections, and two Section Groups titled Characterization and Plot. Figure 1 shows what the hierarchy looks like when the notebook opens.
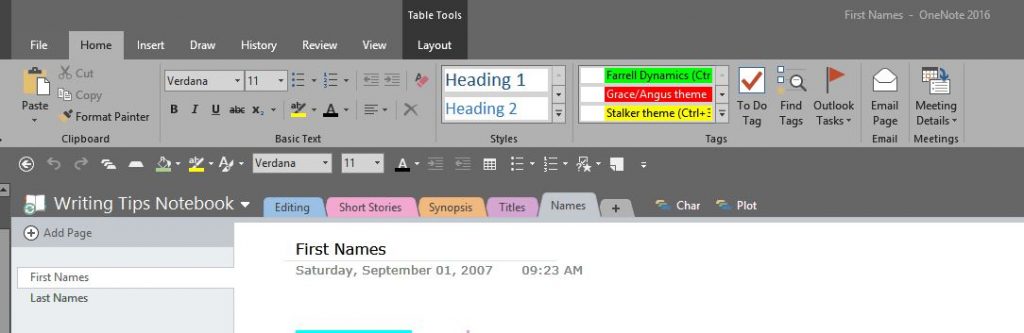
As you can see in Figure 2, the Characterization Section Group contains notebook sections, and each section of a notebook has color-coded tabs lined horizontally, with individuals page listed on the left.
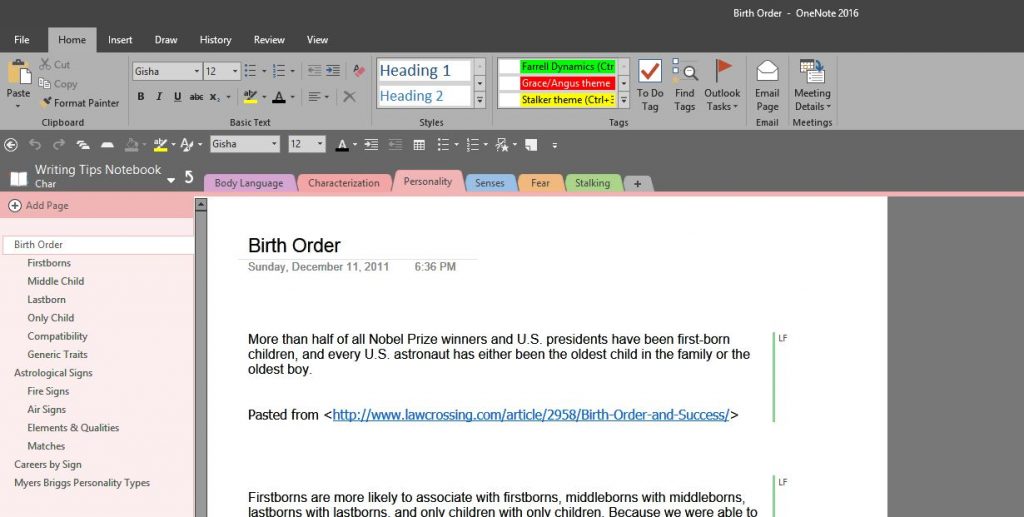
It’s pretty straightforward. In Figure 3, the Plot Section Group contains its own horizontal color-coded sections, with pages listed on the left.
When you use the power of OneNote in conjunction with writing your novel, it expands your ability to stay organized. Figure 4 shows what the hierarchy of the notebook for my current WIP looks like. As you can see, I created a Section Group for all my research and the business documents associated with the book. It keeps them out of view so that when I’m working, my book section isn’t so cluttered.
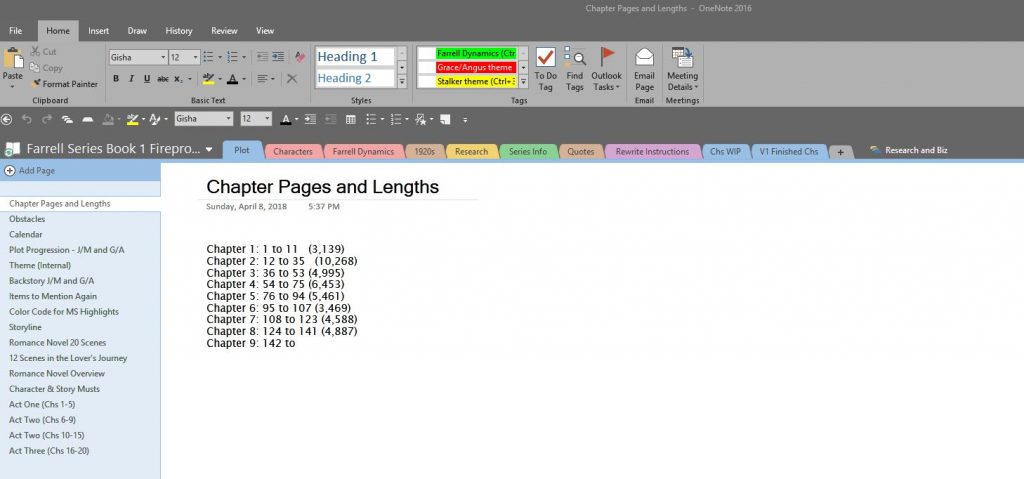
I find OneNote especially helpful with the plot elements of my book. I have separate pages in this section to record chapter pages and lengths, a calendar into which I insert the Chapter and scene as I write it so I don’t have to constantly page back to document what to find what day something happened on, backstory items, reminders about things I HAVE to include in the future, theme reminders, a list of upcoming obstacles I need to incorporate, my chapter-by-chapter outline, etc.
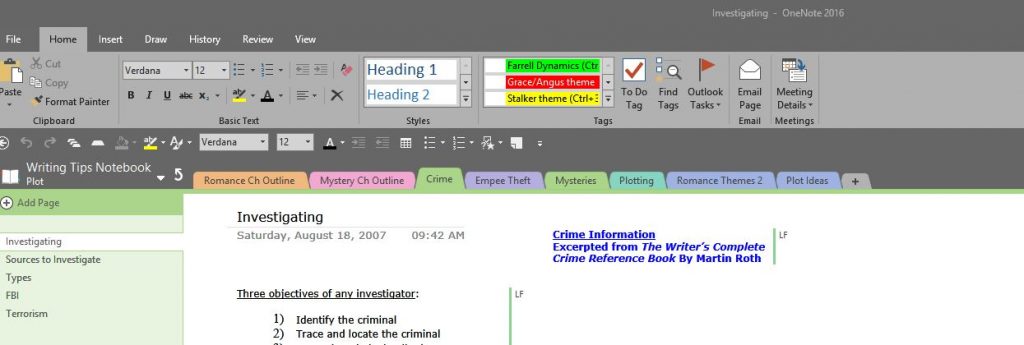
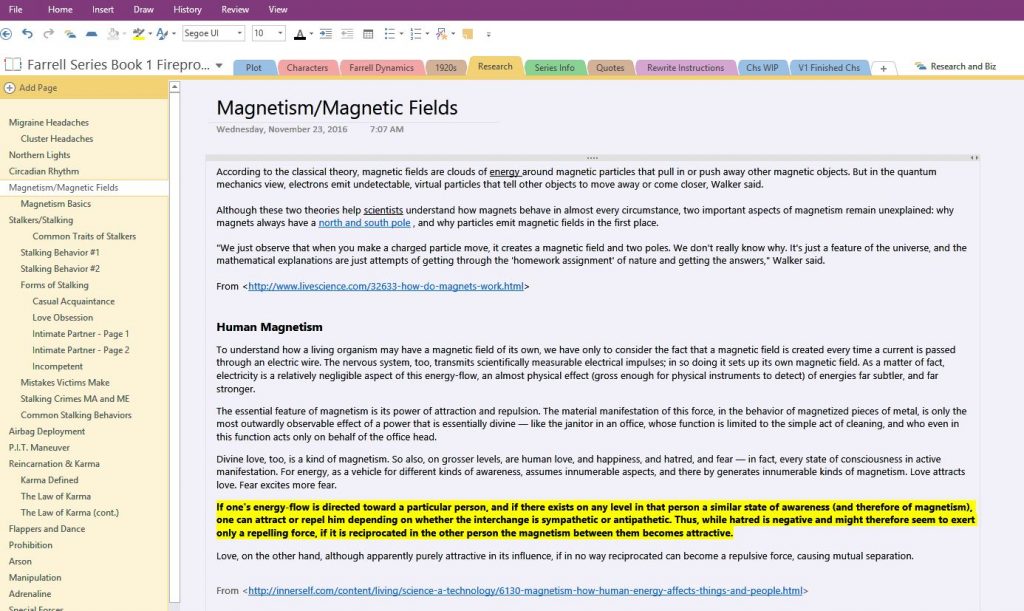
One of the really neat thing about OneNote is the way you’re able to use it to keep Internet resource links and photos. Figure 5 shows how you can copy and paste info from the Internet, and the URL where you got the info gets pasted right along with the content to make it very easy to go right back to that source.
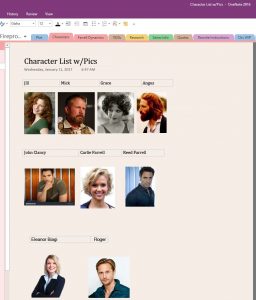
As you can see in Figure 6, I copied and pasted photos of people on the Internet to use as models for my characters.
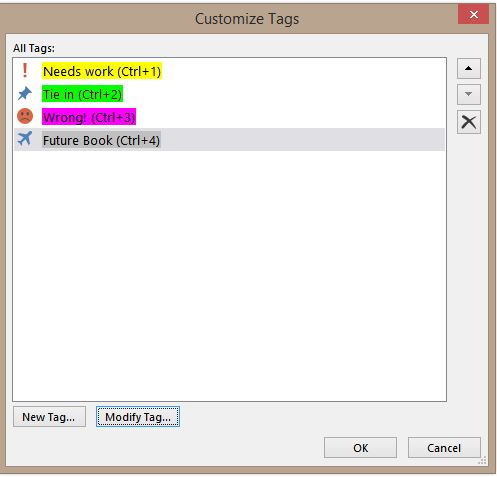
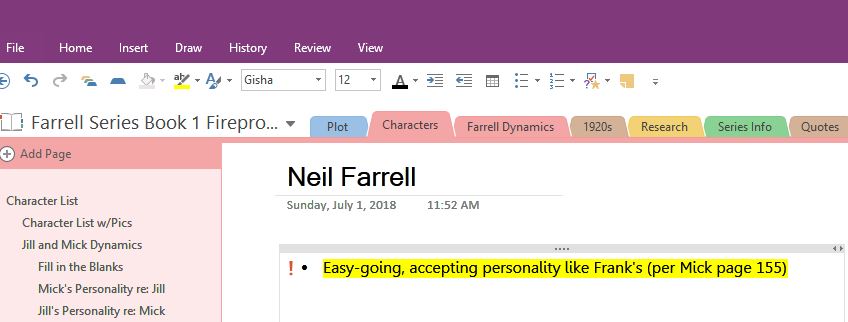
I use Tags in the notebook to remind myself when I need to edit or rewrite something; Figure 7 shows the list of all Tags used in the notebook. Once I create the master list, I can chose from it to enter the appropriate tag over the text in my notebook (Figure 8) and I apply the corresponding highlight color right into my manuscript to mark the section and then move on. If I forget what yellow highlighting means when I’m re-reading the manuscript (especially since I’m also using green and pink highlighting), all I have to do is refer to the color/tag code in OneNote.
I could go on and on, but I’ll spare you. If you think you’ll find using OneNote useful, here are a few different online tools that will help you learn about more about it:
PCWorld article for beginners: https://www.pcworld.com/article/2686026/software-productivity/microsoft-onenote-for-beginners-everything-you-need-to-know.html
Lifwire article for beginners: https://www.lifewire.com/tips-tricks-for-microsoft-onenote-beginners-2511970
Microsoft OneNote tutorial: https://support.office.com/en-us/article/OneNote-video-training-1c983b65-42f6-42c1-ab61-235aae5d0115
I hope these tips you stay on track. I look forward to seeing you in a few days for the final post in this series, Tip #4: Feedcamp (or any product management database).