I’m not a pantser. I don’t have to plot out every single scene before I write, either, but I like to have a framework within which to operate. After years of writing millions of pages of insurance textbooks, countless newspaper and magazine articles, and hundreds of book chapters I’ve settled on a process that keeps me organized. It also allows me more time to write without having to backtrack.
Here are the ingredients to my recipe for keeping on track:
Tip #1: Custom Styles and Themes in Microsoft Word
Tip #2: Custom Chapter-by-Chapter template for outlining both what I plan to write in future chapters/scenes … and what I’ve actually written
Tip #3: Creating multiple notebooks in Microsoft OneNote to keep at my fingerprints everything I need for my current work in progress
Tip #4: Freedcamp (or any other data management software)
 In this post, I’ll discuss ingredient #1 by sharing how I use custom themes and styles to make the writing process easier and more consistent from document to document. In the next three blog posts, I’ll tackle ingredients #2 through #4.
Tip #1: Custom Styles and Themes in Word
Every publisher likes to receive documents in its own preferred format. When you find yourself formatting every single document you create, it’s time to come up with a method to quickly create a document that contains the majority of the formatting elements you’ll need … and for it to be available consistently in the future.
Because the bulk of what I write is either textbook content for my biggest client, or novel manuscripts, I need two different style sets and themes on a daily basis. For example, although most book manuscripts have 1-inch margins around, use double-spaced lines, and Times Roman 12-point font, the client for whom I write insurance content prefers ½-inch margins, line spacing at 1.03, and 10-point font that is not Times. In addition, each publisher has preferred methods of auto-formatting certain punctuation marks.
 I’ve created different styles and themes for each of the two types of documents I use regularly so they’re preset to meet requirements the moment I open them.
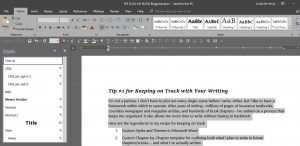
A style collects multiple formatting controls and applies them at once to a selected area of text. For example, you might want your content to be in Times New Roman, double-spaced, and with the first sentence of each paragraph indented ½ an inch. But you want your heading to be in a larger, different font, with extra lines of white space before and after it.
Styles allows you to create the formatting for each section of the page (i.e., content and heading) and to apply them instantly whenever needed, eliminating your need to manually change formatting back and forth. Here are three online resources to help you create styles in your own documents:
Microsoft online instructions for Word 2007, 2010, 2013, 2016, Office 2016 (and Outlook 2013 and 2016): https://bit.ly/2lzbxrn
Microsoft online video instructions: https://bit.ly/2tBJNpI
Easy-to-understand guide on Laywerist.com: https://bit.ly/2InmfKw
Once you’ve created the styles you want to use in a particular type of document (i.e., textbook versus novel manuscript), you can create custom themes to include your styles, margins, colors, fonts, etc. Here are two online resources to help you create themes for your own documents:
Microsoft online instructions for Word/Excel versions 2016, 2013, 2010, 2017: https://bit.ly/2ty7JKw
Microsoft online instructions for Word 2016 and Office 365: https://bit.ly/2MYjXVt
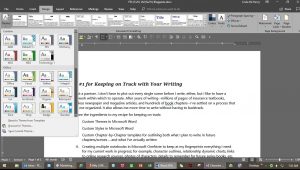
Once you’ve created and saved your document theme, you can either open the template you created or you can create any new Word document and click the dropdown box on the Themes section of the Design tab under Document Formatting.
Using styles and themes helps you achieve uniformity when producing documents, making each document appear the same. This will not only make your editor/publisher very happy, it will also save you a lot of time.
I hope to see in a few days for Tip #2. Feel free to let me know if/how this tip works for you!

Leave a Reply